
Practical ophthalmic procedures vol. 2 teaching set. Full text
Remember
Before performing any eye procedure
- Wash your hands (and afterwards too)
- Position the patient comfortably with head supported
- Avoid distraction for yourself and the patient
- Ensure good lighting
- Always explain to the patient what you are going to do
1. Eyelid control during eye examination (1)
Indications
- To provide a good view for the examiner
- To avoid unnecessary discomfort for the patient
REMEMBER!
When an injured, painful, post-operative or even a healthy eye is being examined, it is important to use gentle hands. To do otherwise may cause further problems. Eyelid control is important!
2. Eyelid control during eye examination (2)
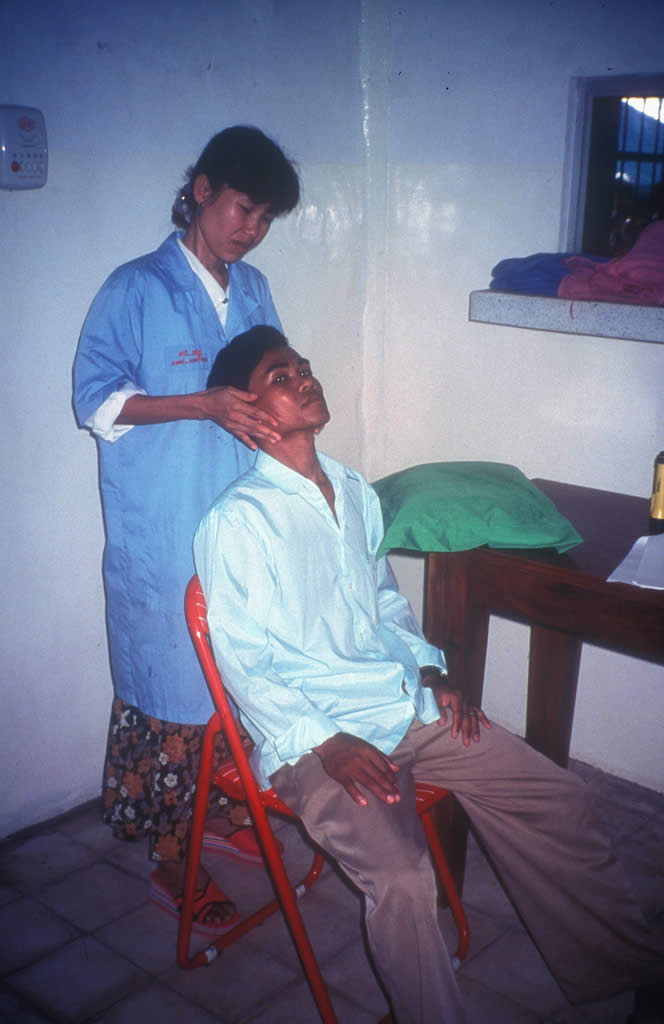
Preparation
- Position the patient with his/her head supported on a pillow, headrest, against a wall or held gently by an assistant
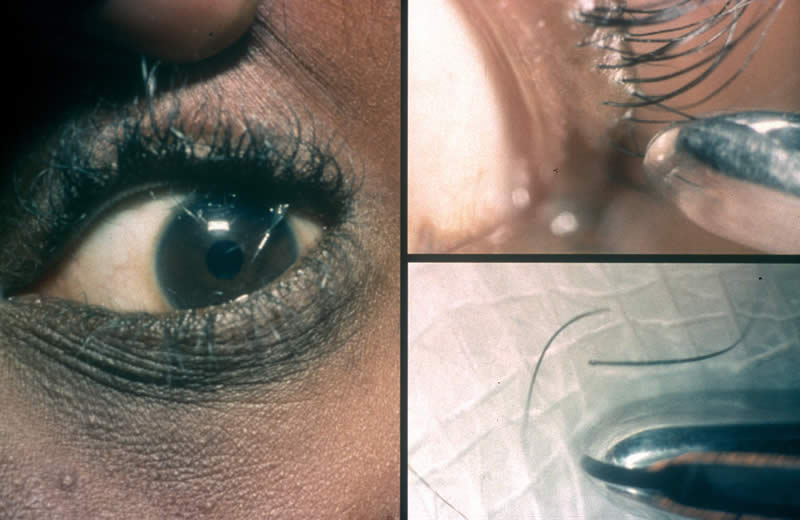
3. Eyelid control during eye examination (3)
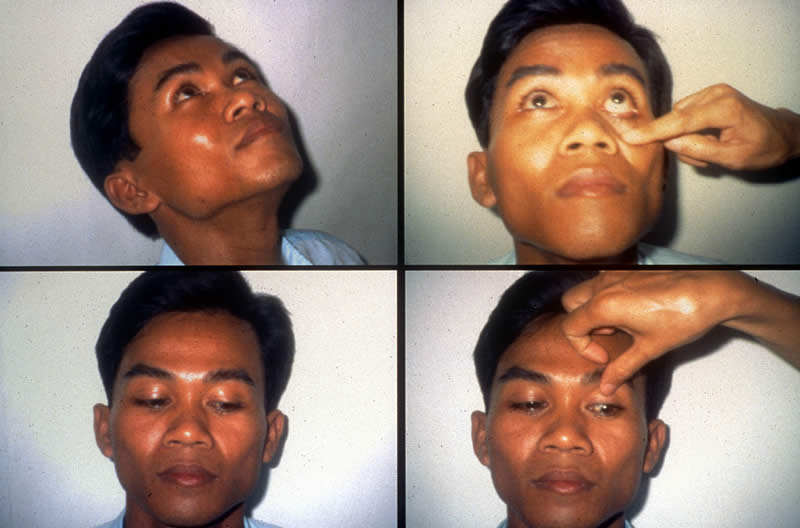
Method
Top pictures:
- Ask the patient to look up
- With the index finger, gently and slowly pull down the lower eyelid.
This position will enable a good view of the lower eyelid margin and lower eyeball.
- Gently and slowly remove the index finger and allow the patient to close the eyes for a few seconds
Bottom pictures:
- Ask the patient to look down
- With the tip of the thumb, gently and slowly hold the top eyelid midway between the eyelid margin and the eyebrow
IMPORTANT!
Do not exert any pressure.
4. Eyelid control during eye examination (4)
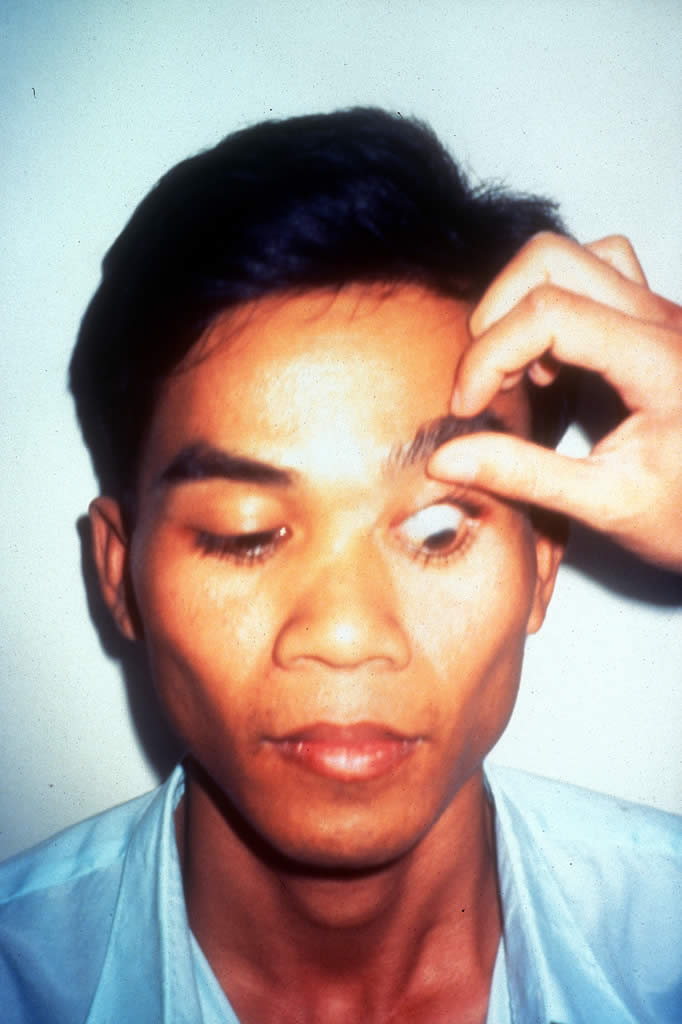
- Ease the eyelid up gently and slowly against the bony orbital rim
This position will enable a good view of the upper eyelid margin and upper eyeball.
- Gently and slowly remove the thumb and allow the patient to close the eyes for a few seconds
IMPORTANT!
These principles should be followed every time and by every examiner.
5. Examining a baby or young child (1)
Indications
To allow examination of a patient who is too young to cooperate alone
REMEMBER!
Any medical examination of a baby or young child may cause distress to the patient and their parent or carer and is, perhaps, particularly increased when attempting to examine the eyes.
6. Examining a baby or young child (2)
You will need
- A helper, e.g., the parent or carer
- A sheet or blanket
- A torch/flashlight
Preparation
- Gain the child’s confidence by taking time to be friendly and playful
- Explain to the parent/carer, and to the child, if he/she is old enough to understand, what you are going to do
- Talk reassuringly to the child throughout the examination
7. Examining a baby or young child (3)
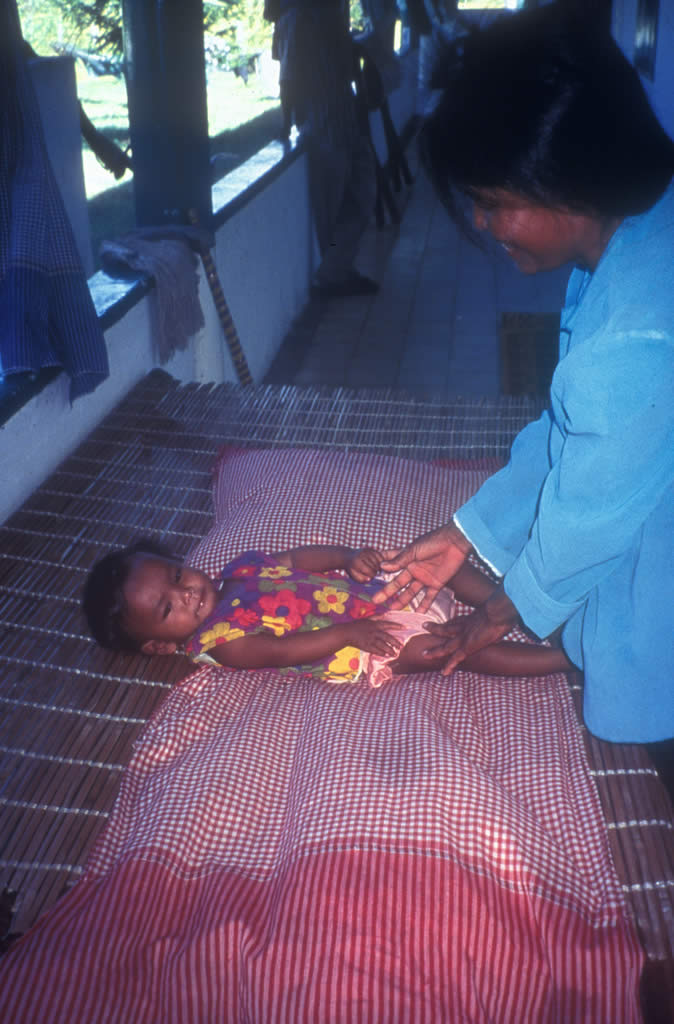
Method
- Ask the parent/carer to lay the child on the sheet or blanket
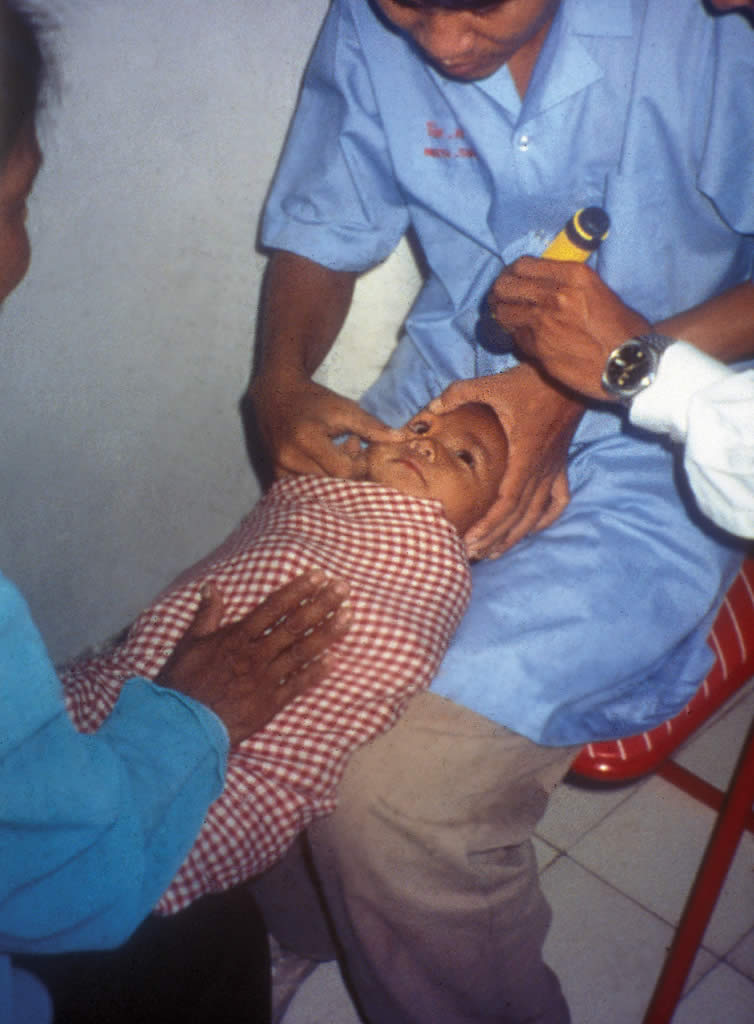
8. Examining a baby or young child (4)
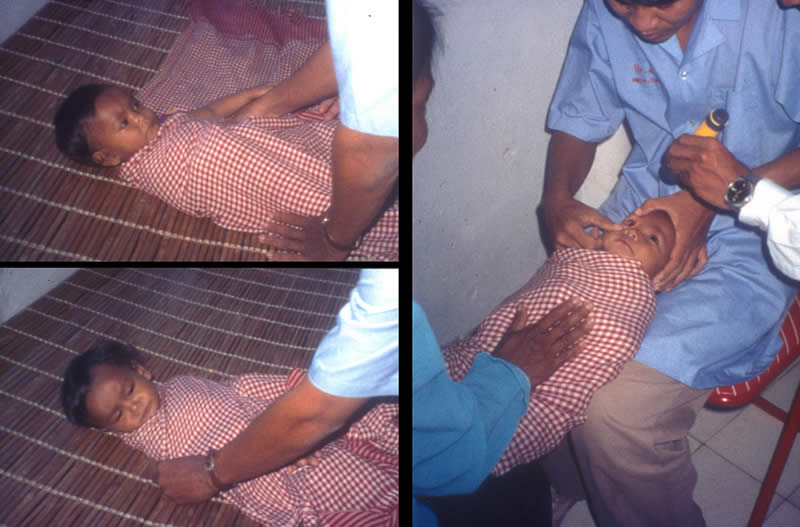
Top left picture: Restrain one arm by wrapping the arm close to the body with the sheet or blanket
Bottom left picture: Restrain the other arm with a second wrap of the sheet or blanket around the body
Right picture: The helper, in a sitting position, holds the wrapped child firmly. The child’s feet are on the helper’s lap and the child’s head is steadied by the examiner. If necessary, a second helper may hold the torch
IMPORTANT!
With such a small patient it is difficult to control the eyelids separately as stated in the previous procedure in this text. Usually the eyelids need to be held open simultaneously. This needs to be done very carefully and gently.
9. Everting the upper eyelid (1)
Indications
- To examine the upper tarsal conjunctiva
- To remove a sub-tarsal foreign body
IMPORTANT!
Do not perform this procedure if a penetrating injury or corneal thinning (e.g., due to ulceration) is suspected.
10. Everting the upper eyelid (2)
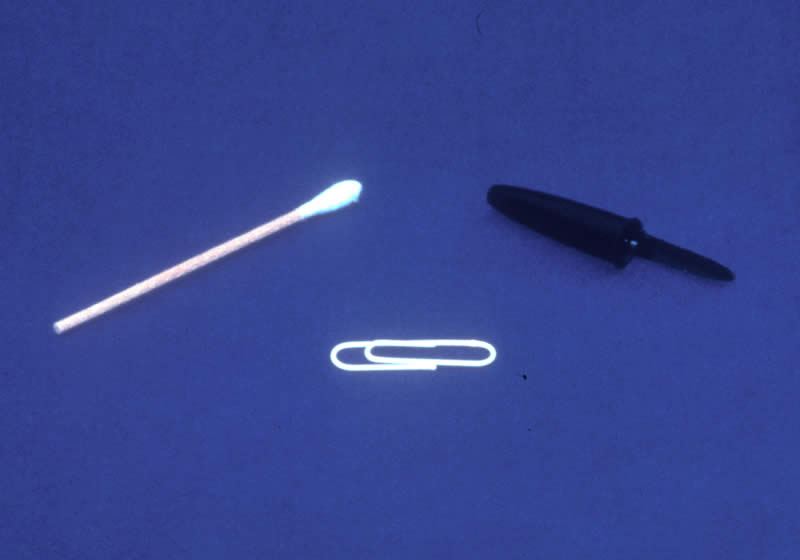
You will need
- Cotton bud or
- Paper clip or
- Small blunt object, e.g., pen top
Preparation
- When explaining the procedure, advise the patient that they will experience a slightly strange feeling affecting the eye but that it is important to relax and keep still
11. Everting the upper eyelid (3)
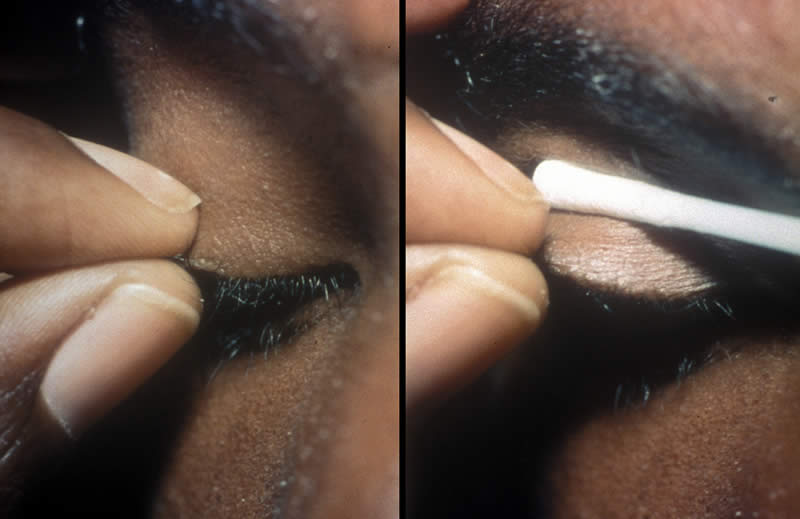
Method
- Ask the patient to look down
Left picture: With one hand, hold the eyelashes of the upper eyelid between thumb and index finger
Right picture: With the other hand place the cotton bud (or paper clip or other small blunt object) midway from the eyelid margin
12. Everting the upper eyelid (4)

Left picture: Turn the eyelid against steady and gentle pressure on the upper eyelid
Right picture: The eyelid will evert to reveal the upper tarsal conjunctiva. On completion of the examination and removal of any foreign body, ask the patient to look up and the eyelid will return to its normal position
13. Removing a sub-tarsal foreign body (1)
Indications
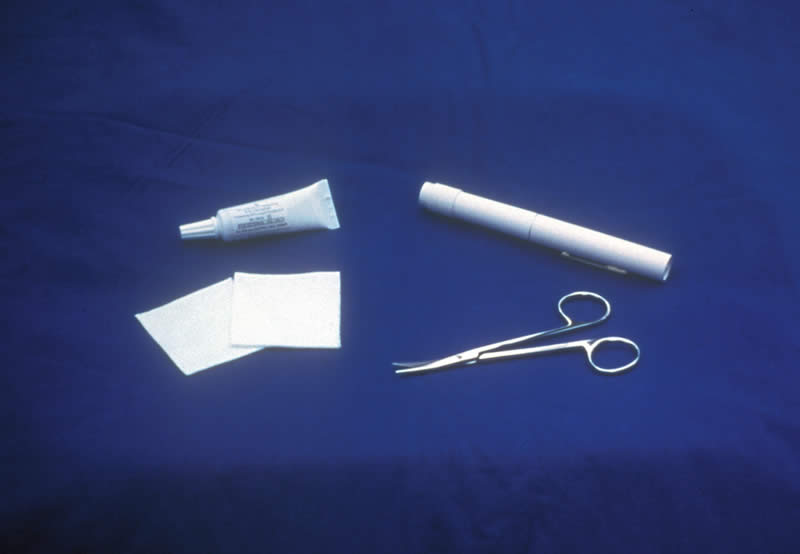
14. Removing a sub-tarsal foreign body (2)

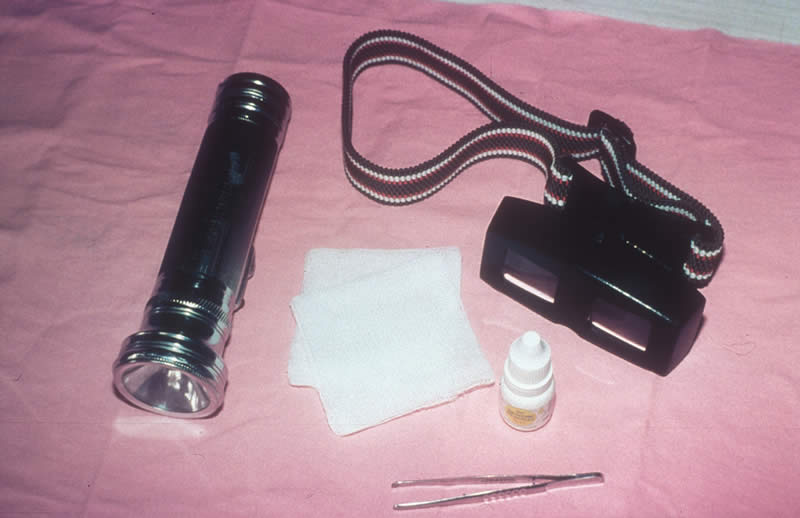
You will need
- Magnification
- Cotton buds and swabs
- Sterile needle
- Antibiotic ointment
- Local anaesthetic eye drops and fluorescein strips
- Saline
- Tape, pad and bandage
Preparation
- Explain to the patient that they may experience a brief increase in discomfort
- Reassure and encourage them by stressing that relief should then be felt immediately
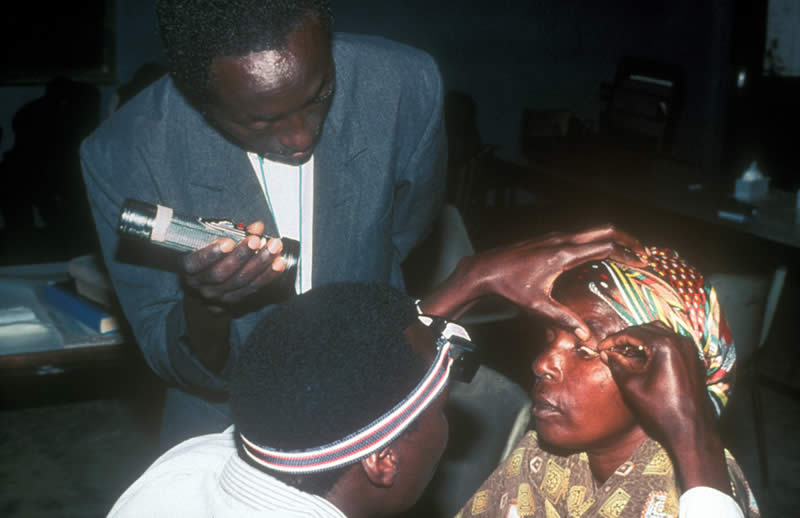
Method
- Instill a drop of local anaesthetic and fluorescein dye (This procedure is explained in a previous text in this series)
- Evert the upper eyelid (This procedure is explained earlier in this text)
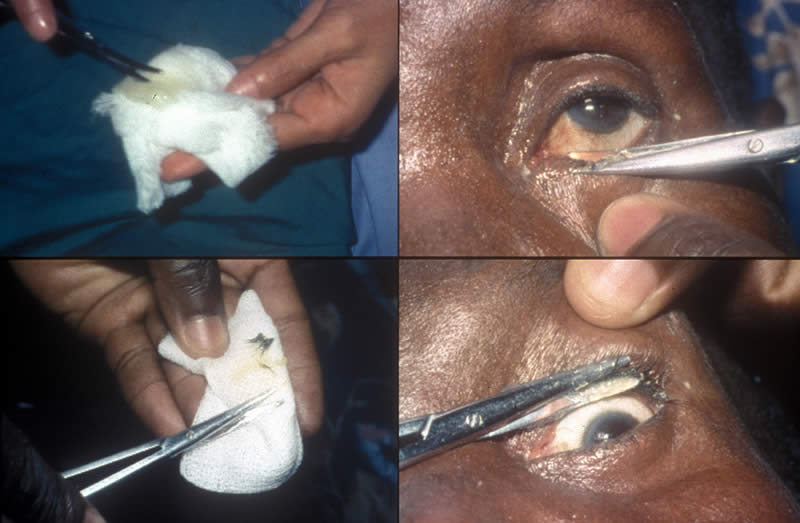
15. Removing a sub-tarsal foreign body (3)
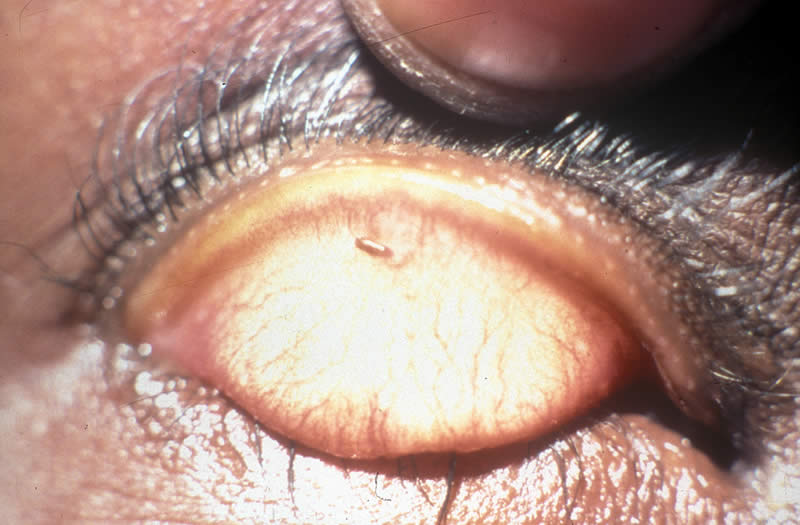
- The foreign body may be large enough to be seen easily
16. Removing a sub-tarsal foreign body (4)
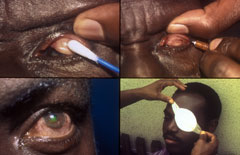
Top pictures: With a gentle upward movement, remove the foreign body using a moistened cotton bud. A needle may be necessary if the foreign body has embedded. If the foreign body cannot be seen, examine the eye again using a torch and magnification to ensure it is not missed. Examine the rest of the eye for further particles.
Bottom pictures: If a corneal abrasion has resulted, instill some antibiotic eye ointment and apply a pressure pad and bandage for 24 hours (These procedures are explained in a previous text in this series).
IMPORTANT!
Review the eye after 24 hours or earlier if pain persists.
17. Epilation of eyelashes (1)
Indications
- To remove ingrowing eyelashes (trichiasis)
- To prevent corneaI irritation/abrasion
18. Epilation of eyelashes (2)
You will need
- Magnification
- Torch/flashlight
- Gauze swabs
- Local anaesthetic eyedrops
- Epilation forceps
- Helper
Preparation
- When explaining the procedure, advise the patient that they will experience some very brief discomfort
19. Epilation of eyelashes (3)
Method
- Position the patient, helper and examiner appropriately. The helper can hold the torch
- Instill a drop of local anaesthetic (This procedure is explained in a previous text in this series)
20. Epilation of eyelashes (4)
Left picture: Identify the eyelashes which need epilating
Lower eyelashes
- Ask the patient to look up, fix gaze and keep quite still
- With an index finger, gently hold down the lower eyelid
Upper eyelashes
- Ask the patient to look down, fix gaze and keep quite still
- With a thumb, gently ease the upper eyelid up against the orbital rim
Top right picture: With the epilation forceps in the other hand, hold the ingrowing eyelash close to its base and pull gently forwards to pluck it out.
Bottom right picture: Between epilations, wipe eyelashes off the forceps with a clean swab.
21. Cutting of eyelashes (1)
Indications
- To allow surgical access without eyelashes obscuring view
- To prevent eyelashes falling into operation site
- To reduce discomfort, sticky eyelid margins and distortion of eyelashes post-operatively
IMPORTANT!
Eyelashes must not be cut before eyelid surgery or when there is a suspected penetrating injury. This is not always a routine procedure prior to intraocular surgery; it depends upon the surgeon’s preference and so it is always advisable to ask first!
22. Cutting of eyelashes (2)
You will need
- Torch/flashlight
- Gauze swabs
- Blunt-tip, curved scissors
- Lubricant gel or eye ointment
REMEMBER!
This can be a very alarming procedure for a patient. Try not to make the scissors obvious. Bring the scissors from behind and below. Never hold the scissors directly in front of the patient’s eye! This will naturally frighten the patient.
Preparation
- Reassure the patient that the eyelashes will grow again but that some itching may be experienced during re-growth
- Position the patient lying comfortably with the head supported on a pillow
23. Cutting of eyelashes (3)
Method
Top left picture: Lubricate the scissor blades, whilst open, with the gel or ointment on a gauze swab.
Lower eyelashes
- Ask the patient to look up and keep quite still
- With the thumb or index finger of one hand, gently pull down the lower eyelid
Top right picture: With the lubricated scissors in the other hand, carefully cut the eyelashes as close to the skin of the lower eyelid margin as can be safely done.
Upper eyelashes
- Ask the patient to look down and keep quite still
- With the thumb or index finger of one hand ease the upper eyelid gently up against the orbital rim
Bottom right picture: With the lubricated scissors in the other hand, carefully cut the eyelashes as close to the skin of the upper eyelid margin as can be safely done
Bottom left picture: Wipe the scissor blades on a piece of clean gauze after each cutting. Lubricate the scissors again and repeat the procedure until all the eyelashes have been cut. Using a torch and magnification, check the eye and remove any loose eyelashes with a moist swab.
IMPORTANT!
Right or left handed practice will determine the eye worker’s position when performing this procedure. The teacher should advise.
24. Cutting of eyelashes (4)
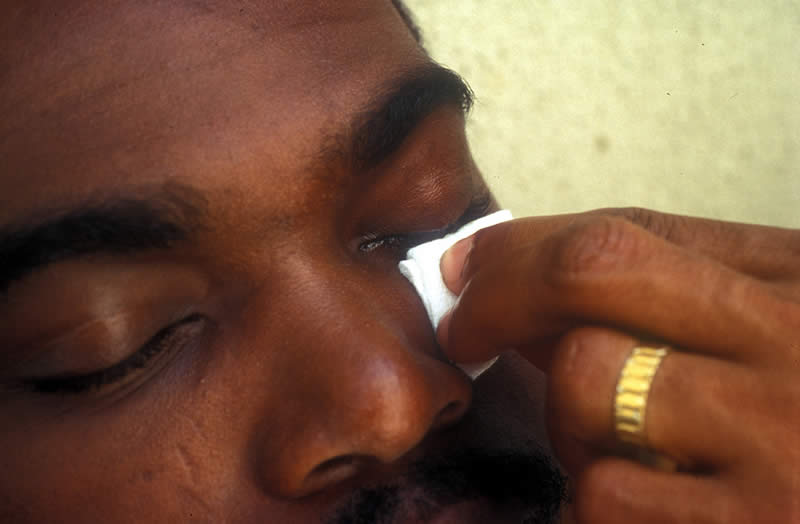
FINALLY
Clean the eyelid margins gently to remove any gel or ointment (This procedure is explained fully in an earlier text in this series)
Acknowledgements
This teaching slide set was initiated and prepared by Ms Sue Stevens, Ophthalmic Resource Coordinator and Nurse Consultant, International Resource Centre, International Centre for Eye Health, Institute of Ophthalmology, London. Refinements were suggested by Dr Murray McGavin and Mrs C Patricia Fathers. Secretarial support was given by Ms Kay Hawkins and Mrs Anita Shah.
Photographs in this teaching slide set were produced by:
- Pictures 2, 3, 4, 6 ,7, 8, 10, 14, 22, 23 – Ms Sue Stevens
- Pictures 11, 12, 18, 19, 20 – Dr Murray McGavin
- Picture 16 – CBM International
- Picture 15 – Dr Allen Foster
- Picture 24 – Mr Pak Sang Lee
Thanks are due to the following for their help in creating the pictures:
- Ingrid Cox, Kikuyu Eye Hospital, Kikuyu, Kenya
- Staff of Ruharo Eye Unit, Mbarara, Uganda
- Staff of Takeo Eye Hospital, Takeo, Cambodia
Many ophthalmic nurses worldwide, too numerous to mention by name, contributed by suggesting ophthalmic procedures for this teaching set programme.
Supported by CBM International, Dark and Light Blind Care, HelpAge International, Sight Savers International, Stanley Thomas Johnson Foundation.
© 2001. International Centre for Eye Health, International Centre for Eye Health, London School of Hygiene & Tropical Medicine, Keppel Street, London WC1E 7HT, United Kingdom